
Layout Design Fundamentals
On this page
- 4.2 Layout Design Fundamentals
- 4.2.1 Card Size, Orientation, Front, and Back
- Physical Specifications
- Design Each Side
- Bleed and Safe Areas
- 4.2.2 Canvas, Grid, Rulers, and Guides
- 4.2.3 Selecting, Moving, Resizing, and Rotating Objects
- 4.2.4 Alignment, Distribution, Layers, and Groups
- 4.2.5 Properties and Object Settings
4.2 Layout Design Fundamentals
Start with finished dimensions, orientation, and sides. Arrange titles, photo, details, and codes before standardizing fonts, colors, and spacing. This avoids rework when specifications change. You can establish the layout using a fixed title, a photo-frame rectangle, and labels before adding dynamic objects.
4.2.1 Card Size, Orientation, Front, and Back
Physical Specifications
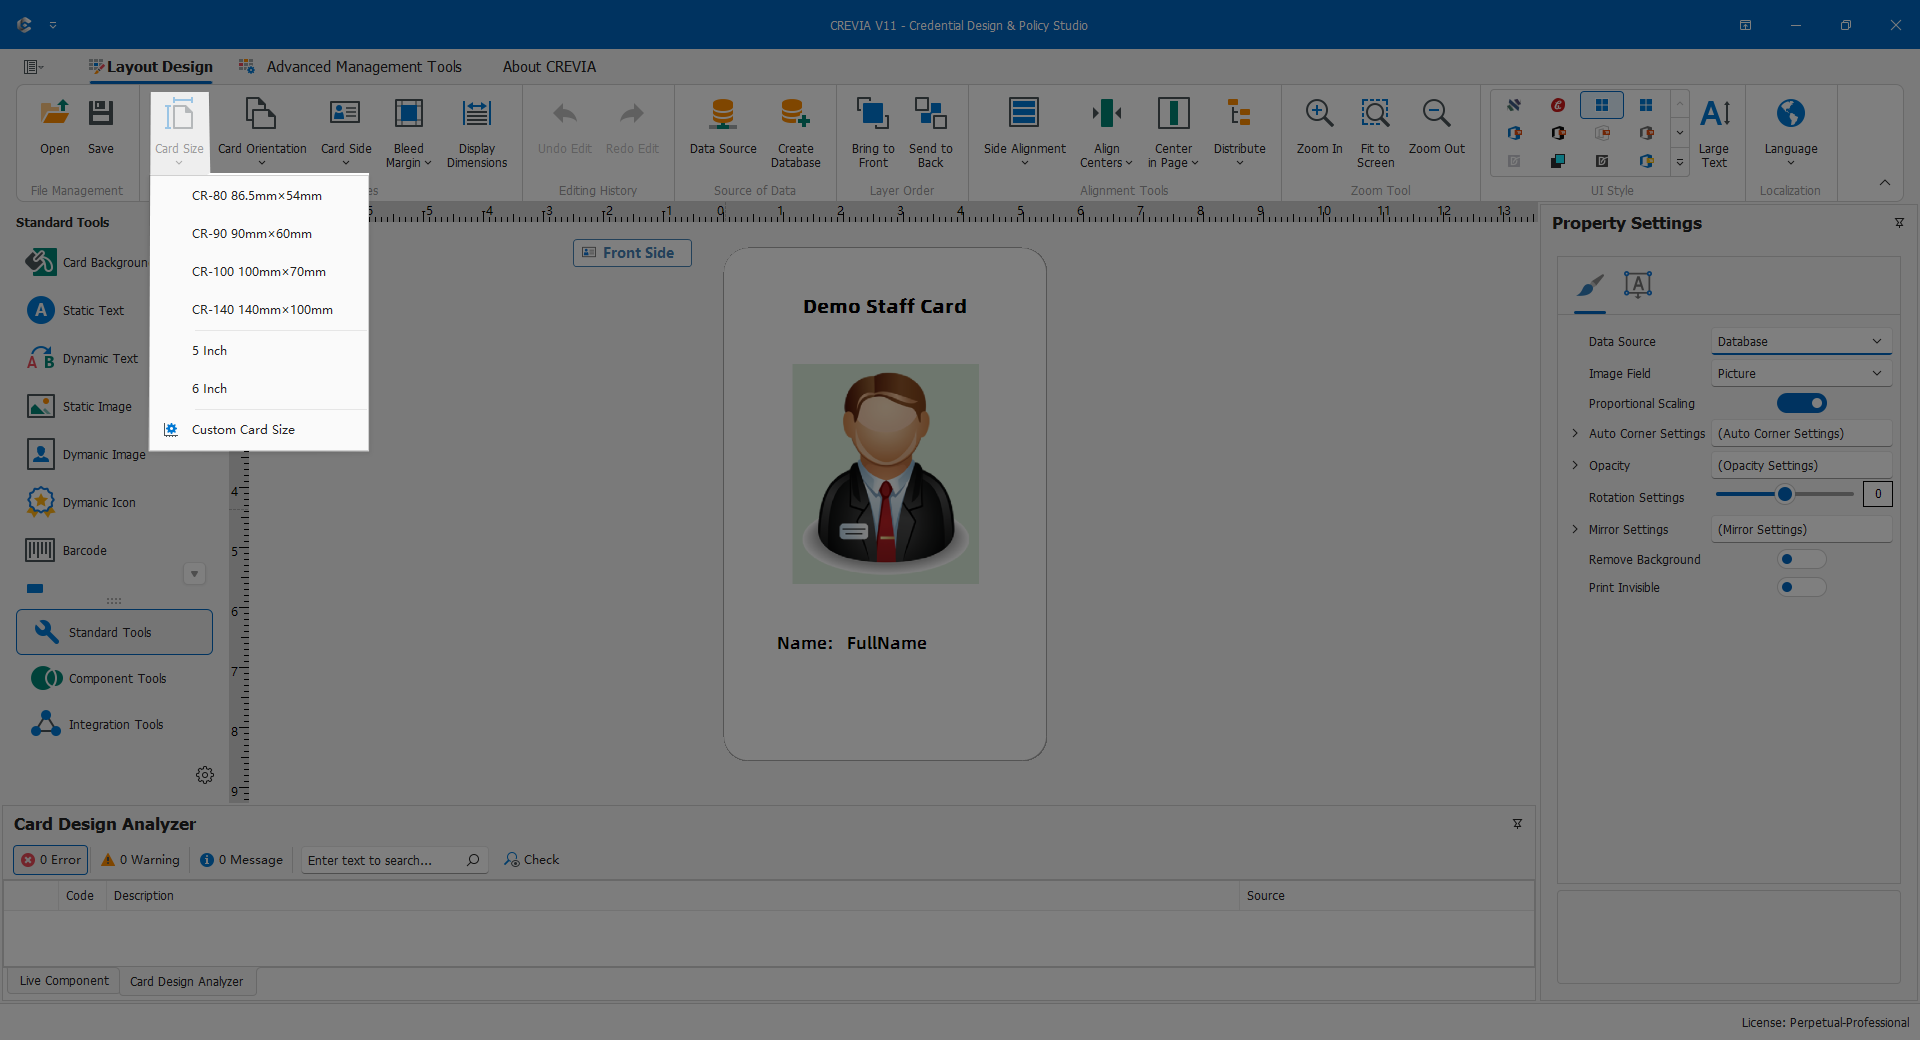
- Confirm width, height, and whether a back is needed from the stock, printer, or print provider. A photo of an old card is not a measurement.
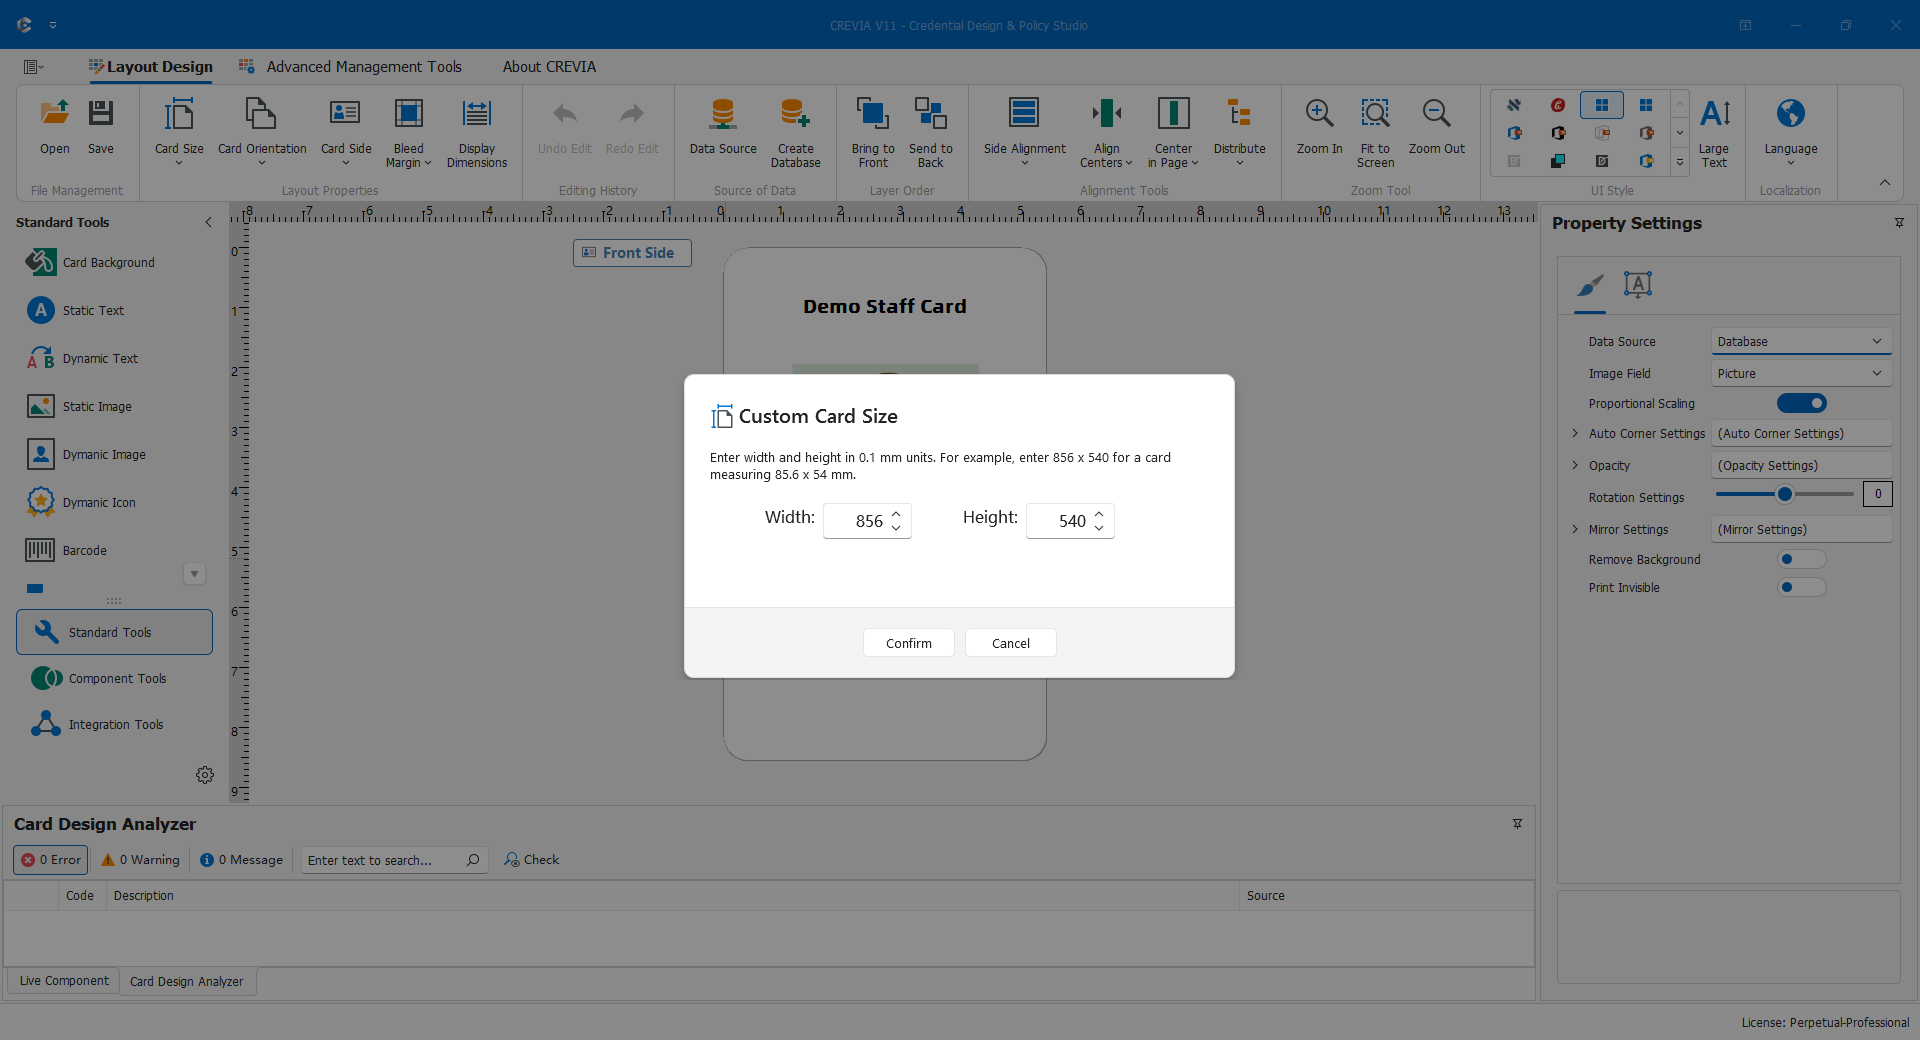
- Open Layout Size and select a matching preset, or enter width and height in Custom Size, observing the displayed units.
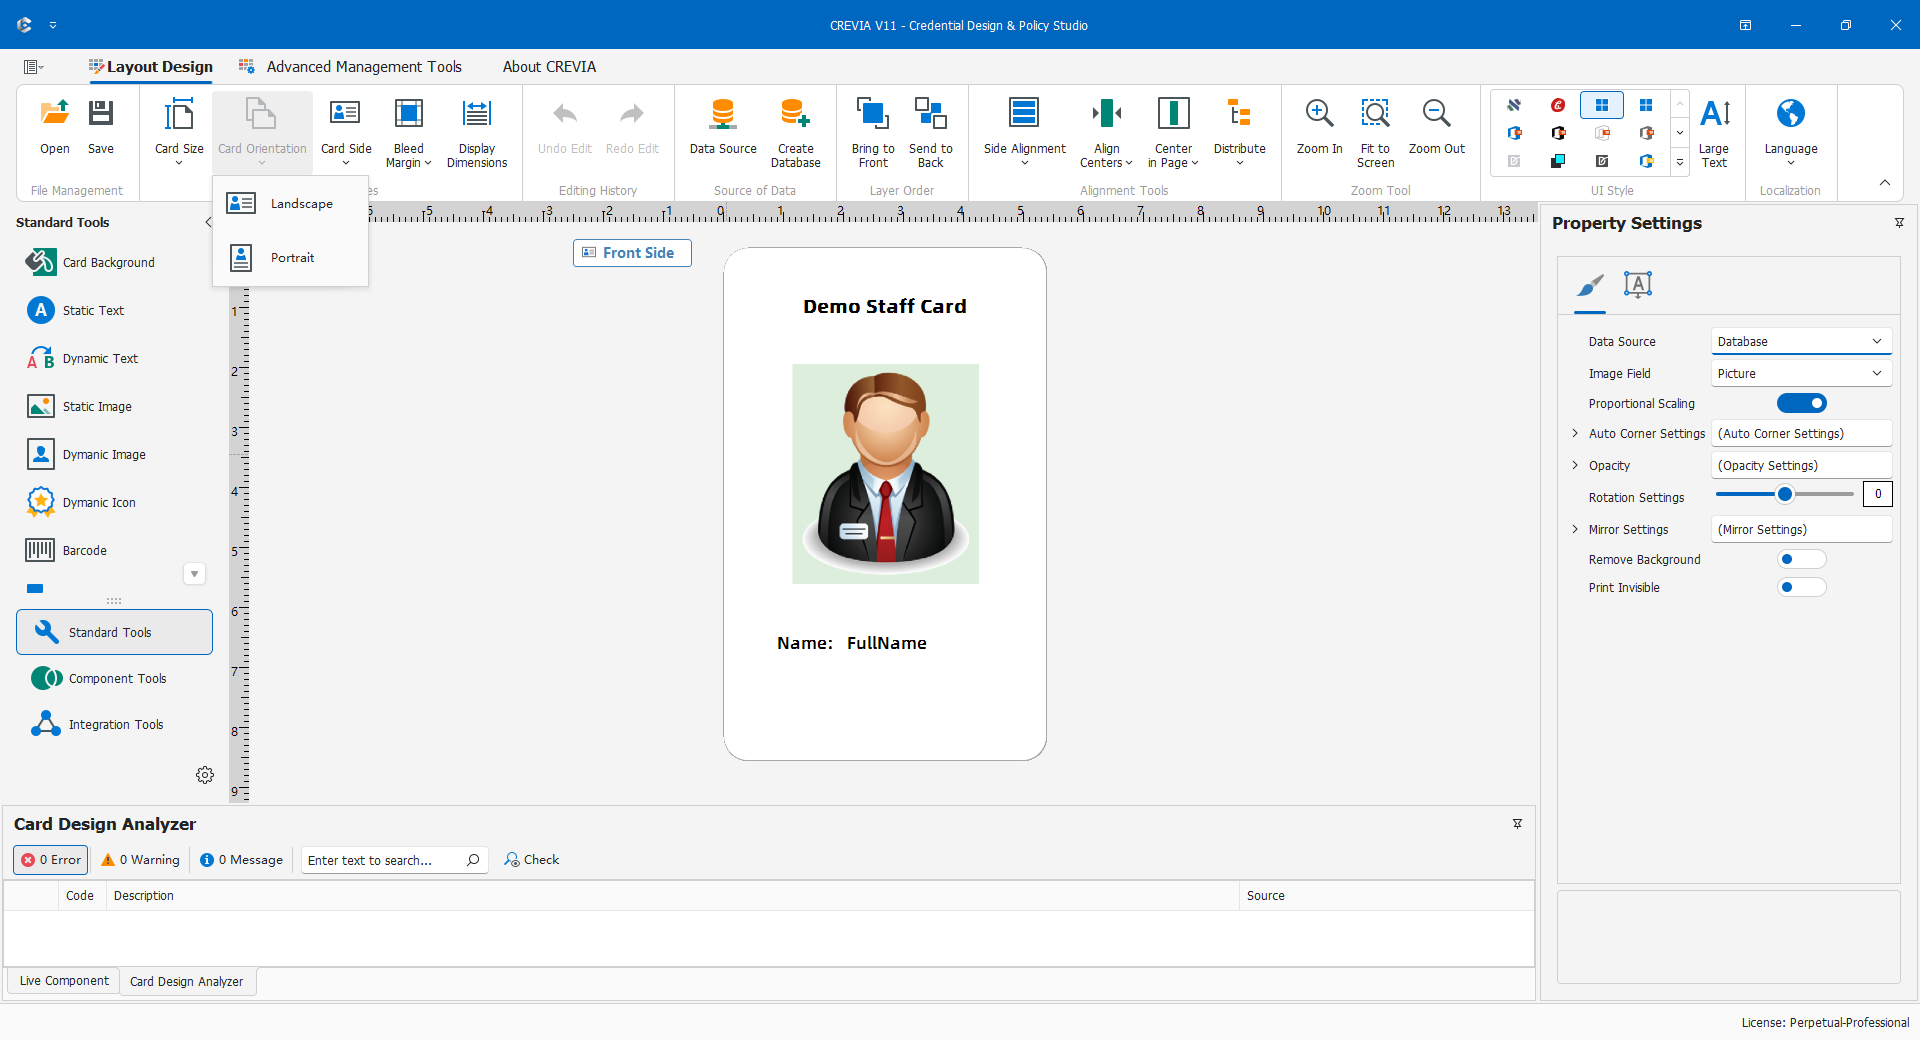
- Set orientation: landscape suits side-by-side photo and information; portrait suits vertical composition.
- Use Fit and confirm the proportions before adding objects.
Orientation sets the whole card's width/height relationship; object rotation changes an individual angle. Do not reorient the entire layout merely to straighten one graphic.
Design Each Side
Switch the card-side control to design the front and back separately. Put identity information on the front and approved instructions or fixed service information on the back. Confirm the current side before editing. An empty back may simply be undesigned.
Check that front objects remain in place after switching back. A designed back does not enable duplex hardware output; configure that separately in COC and the device.
Bleed and Safe Areas
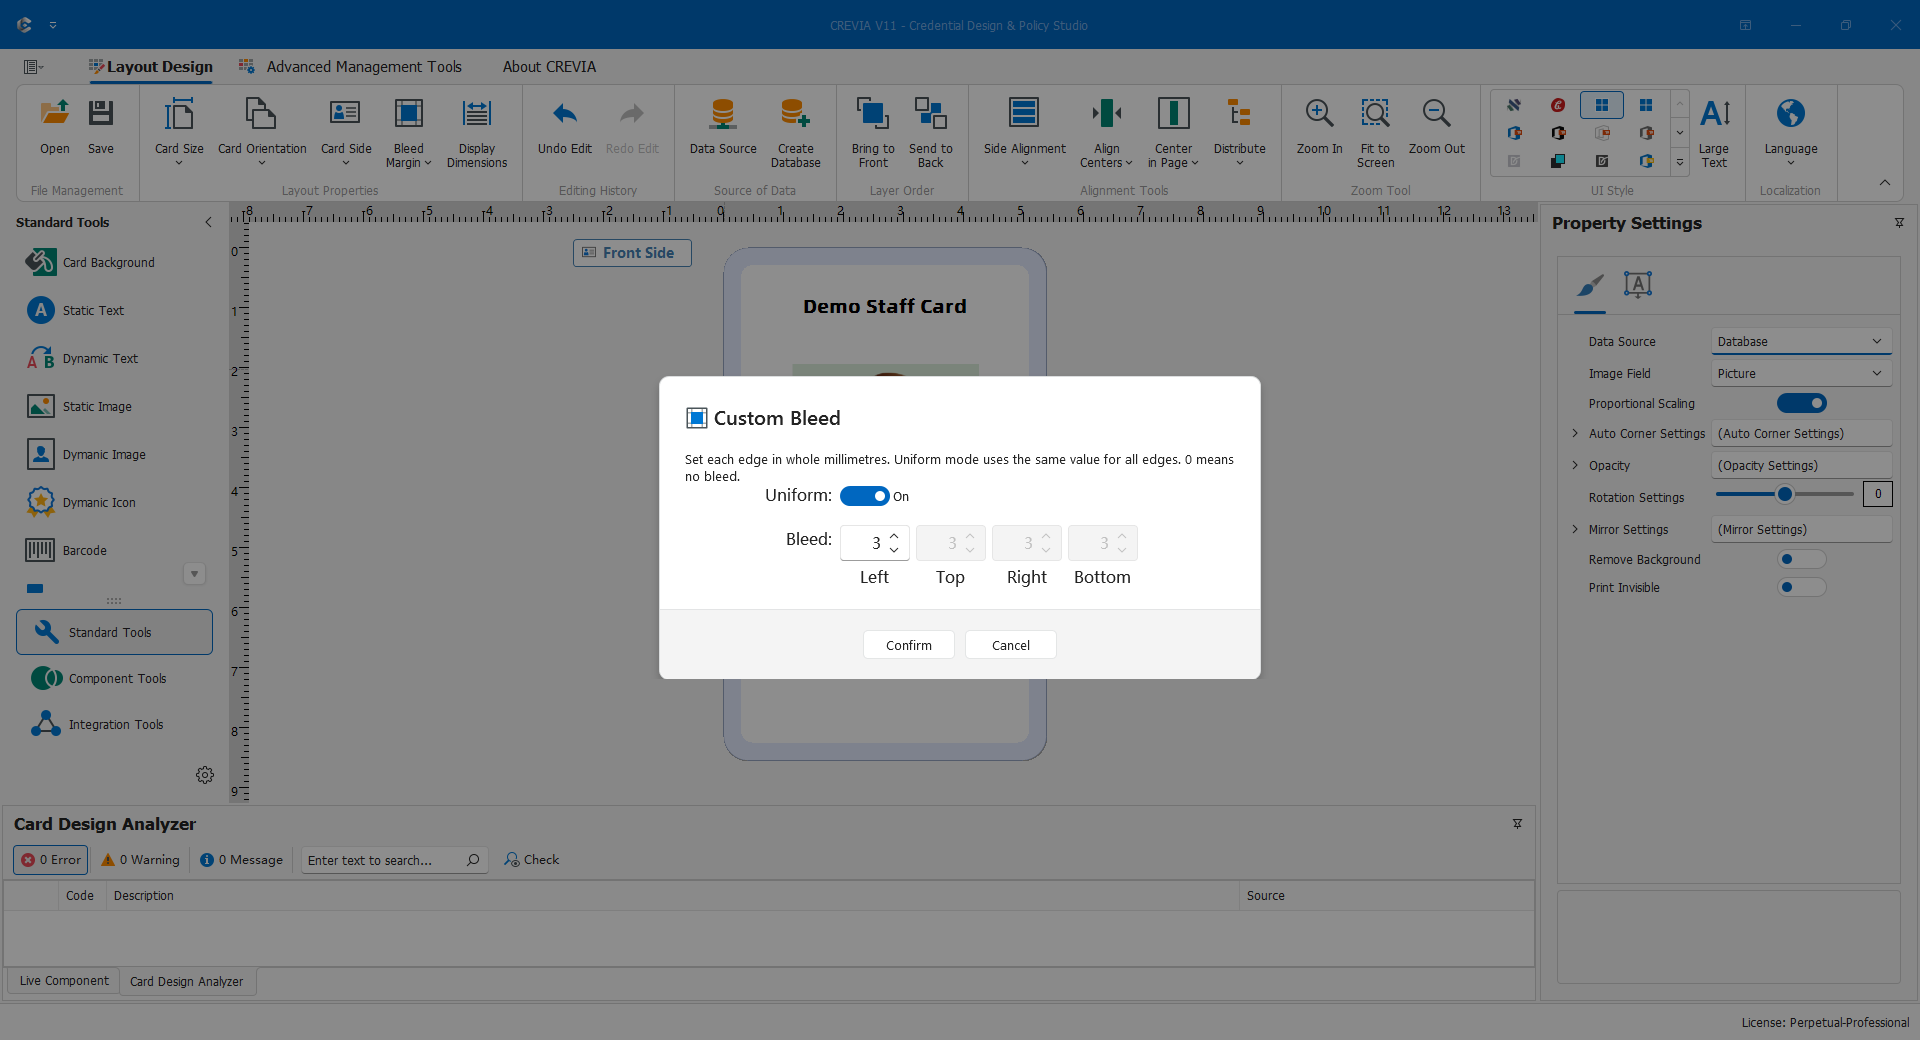
Use the print provider's left, top, right, and bottom bleed requirements. Apply a common value only when appropriate. Bleed is a design reference, not an automatic cutting command or a substitute for driver paper, scale, and alignment settings.
Backgrounds may extend beyond the intended trim; names, numbers, and codes should remain within the safe area. Determine margins from the actual stock, finishing, and device. Test output to ensure trimming, rounded corners, and device offsets do not intrude on important content.
4.2.2 Canvas, Grid, Rulers, and Guides
Canvas zoom changes observation, not physical output dimensions. Display scaling and screen resolution also affect appearance; rely on layout settings and measured output.
- Fit the card to inspect proportions and out-of-bounds content.
- Zoom in for text spacing, image edges, and code quiet zones.
- Zoom out or Fit again to check the overall visual balance.
- Enable object-size display where available and verify actual position and size properties.
Grids, rulers, and guides help compare edges and distances but are not printed artwork. Availability depends on the interface. Position values and alignment tools can still provide precise placement without these references.
If name and department lines look uneven, compare their left coordinates and align them. Changing zoom cannot align objects because it does not change their positions.
4.2.3 Selecting, Moving, Resizing, and Rotating Objects
- Select the intended object on the correct side and check its frame and property type.
- Establish content and display behavior first: the full title, logo, or photo proportions.
- Drag for approximate placement, then set exact coordinates and dimensions. Use object rotation rather than whole-layout orientation when appropriate.
- Deselect and check complete text, undistorted images, and boundaries.
Resizing a frame does not necessarily preserve an image's aspect ratio or fit long text. Use proportion-preserving photo display and do not squash codes to fill a gap.
For multiple objects, use the canvas's multi-selection mechanism and verify the selected set before moving or aligning. In overlapping areas, distinguish the text, photo, and background frame. After common appearance changes, check each dynamic binding individually.
Use Undo for an accidental canvas move; use Redo only after confirming what should be reapplied. Database writes, interface calls, and user management are not necessarily part of canvas undo history. Back up and read prompts before those operations.
4.2.4 Alignment, Distribution, Layers, and Groups
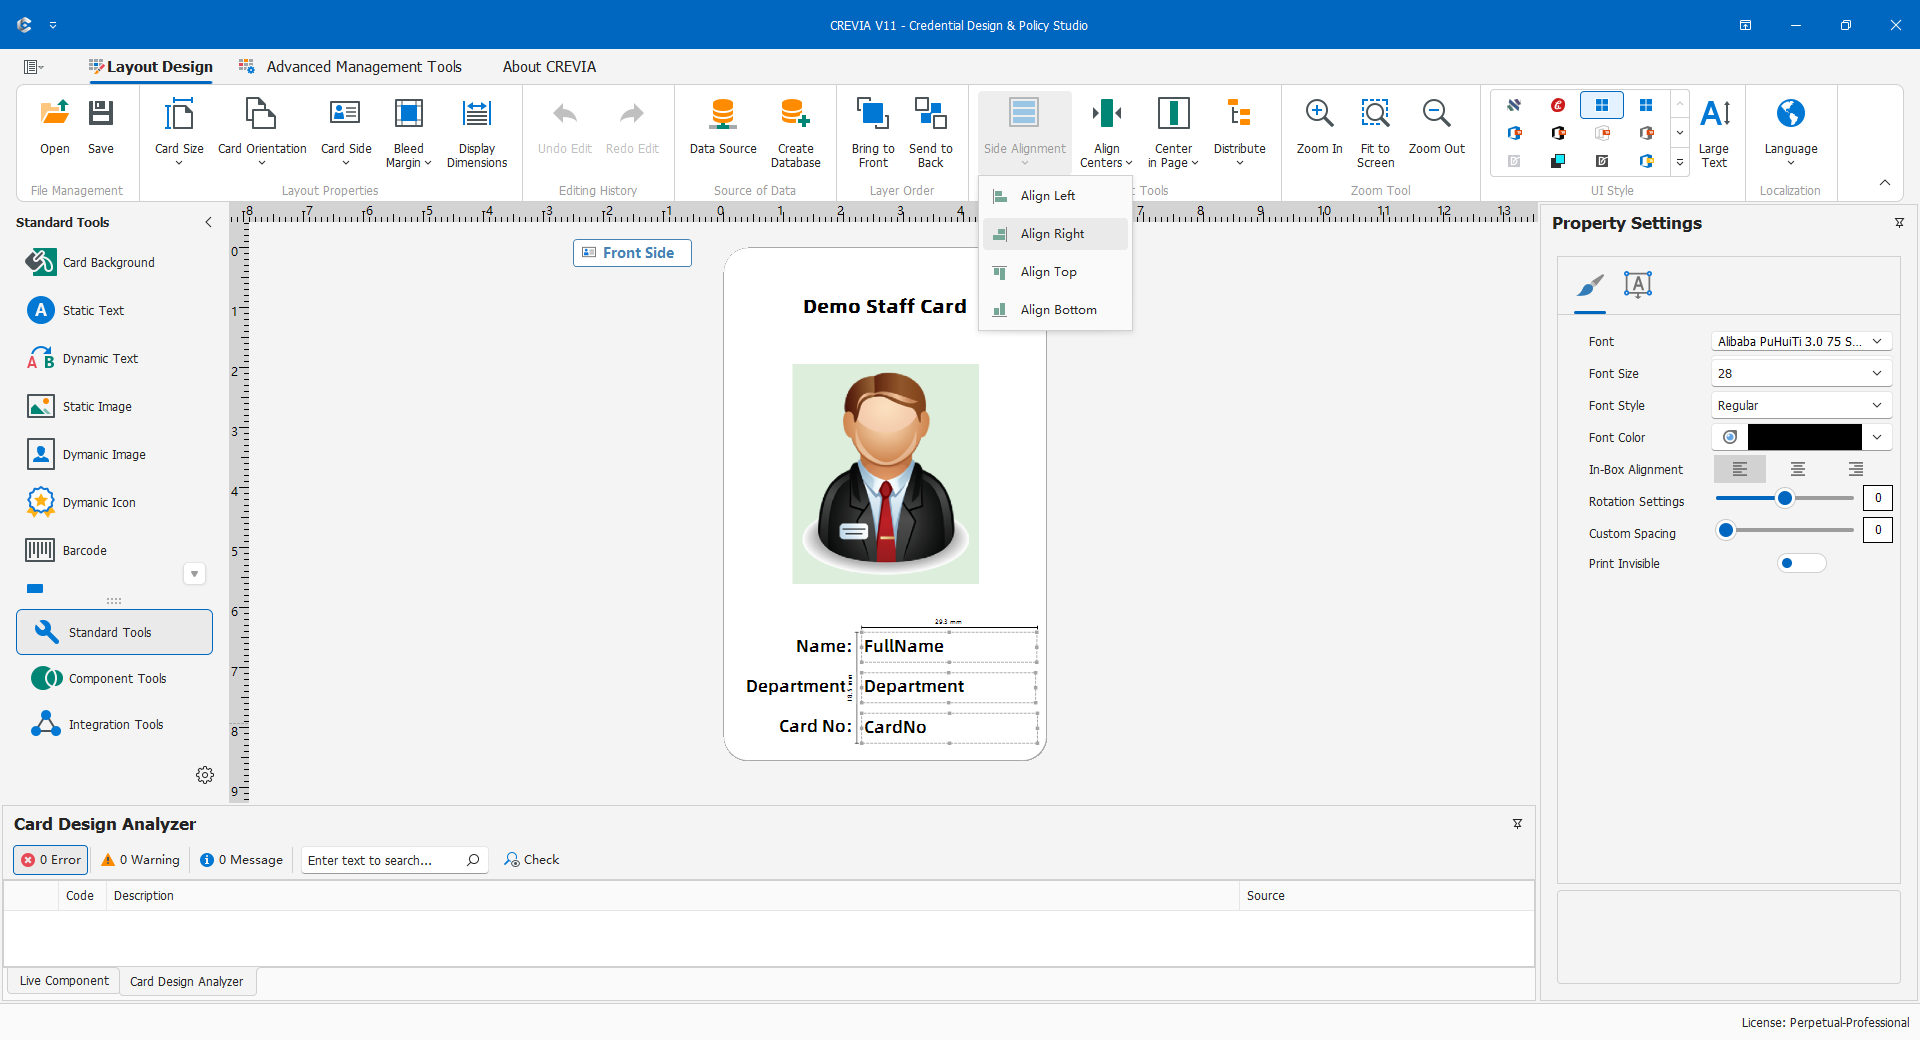
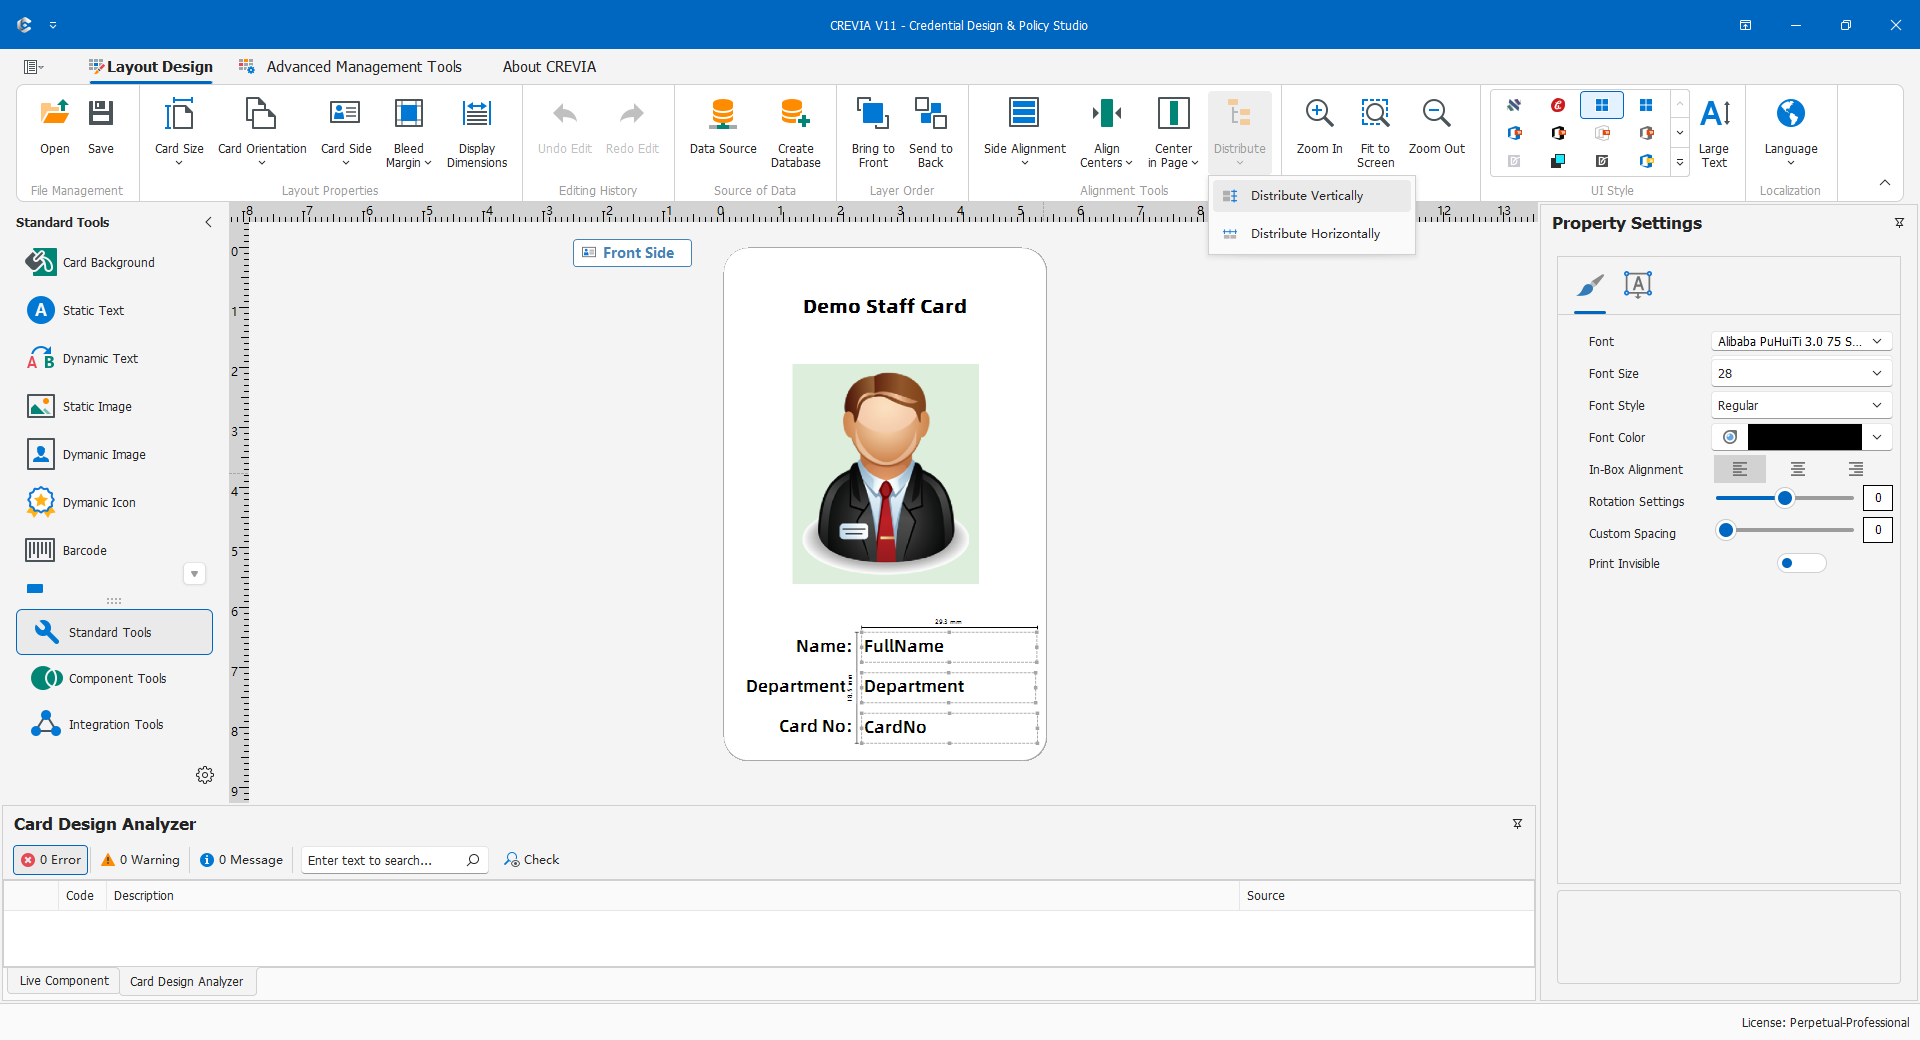
Alignment controls edges and centers; distribution controls spacing; layering controls occlusion. Set reasonable object sizes first, since later font or image changes can disrupt the arrangement.
- Edge/center alignment aligns selected objects to one another.
- Equal distribution regularizes gaps between multiple objects.
- Page centering positions an object within the card, not merely relative to another selection.
- Layer commands place backgrounds behind content or bring text forward.
To arrange name, department, and number, position them roughly, select all three, apply left alignment, then use vertical equal spacing after checking the first and last object's bounds. Deselect and test the longest values. If a row needs more height, adjust it before distributing again.
If a colored rectangle covers text, send the rectangle to the back or bring the text forward; recheck photos and codes. Move a region using multi-selection or grouping where the current menu supports it. Grouping organizes geometry; name and number still retain separate data bindings.
4.2.5 Properties and Object Settings
Properties show settings for the current selection. Geometry, fonts, and colors affect appearance; fields, files, and interface settings determine content. Inspect complete business configuration with individual selection and use multi-selection primarily for shared appearance.
Set content, then dimensions and position, then fine styling. Test dynamic text with actual long values, not only a short sample.
| Symptom | First check |
|---|---|
| Text exceeds its frame | Actual content and font, then width or font size. |
| A portrait is stretched | Display mode and aspect ratio before altering the stored photo. |
| Correct coordinates but invisible | Current side, layer order, and card boundaries. |
| Interface labels are too small | Large Text; printed text requires the object's font settings instead. |
Finish by checking physical specifications, both sides, unintended overlap, close-up detail, and overall composition; then save.